Wednesday, 30 September 2020

The Great Terrain Build-Off

As both Merlin and myself look at the games we play and assess what we have, he decided he needed more terrain, especially buildings. I suggested looking at the Warhammer Townscape set, as many of the buildings are suitable for fantasy and medieval games.
He decided to start with Building 19 in the set, it being a fairly straightforward build. Rather than just encourage him I decided to challenge him to a build-off, both of us producing our own take on the building and blogging our results (see his build here).

Now I have built this building before. Twice. Many years ago I made it for Orc's Drift, it's building number 2 in those games, you can see it top left in the following picture.

Bloodbath at Orc's Drift

My first build was made from really thick card that we used to get supplies in at work, (think 'chipboard', in the Wylock sense rather than the UK sense, but about 5mm thick). 

I made it again much more recently at 60% the size for 15mm gaming. You can see this version here.
My second version used thick card from packaging from a well known online retailer and major South American River. The small size of the model meant I could get away with thinner materials. 

For this challenge build I'm going for foam board. 
I was tempted to alter the look of the building considerably. I want some crude drystone buildings for a future project and this seemed a good opportunity to experiment. However, on reflection that doesn't seem to fit the spirit of the challenge, so I'll make it as close to the original as possible. 

Well, I say I'll be sticking close to the original, but I'm changing a couple of features. As I mentioned in the 15mm build, the chimney could be shifted to a wall. I'm thinking that the extension might be a bake house, so a chimney shared by the main building and the bake house sounds sensible.  Thinking about the purpose of the build will help me when it comes to painting and adding little details.  A bake house will need lots of fuel for the ovens, and perhaps sacks of flour.

I also noticed that the Townscape includes an optional lean-to. I have no recollection of this on the Orc's Drift model, and I must have missed it in the Townscape when I built the 15mm version (it is on a different page, my excuse and I'm sticking to it). Lean-tos were a common extra on these card models, it's pretty much up to the builder where they go. One of the side walls is blank, and I was originally planning to put it there. I cut the wall height down so it fit. But once I'd built up the foam board shell I decided it looked better on the end wall opposite the bake house. 

Construction is pretty straightforward. Rather than print off the relevant pages I set the pdf to 100% and measured on the screen. I did fudge some of the measurements as they were odd, leading me to suspect that the pdf is slightly out of scale. Ah well. 

My foam board is a tatty bit of old advertising, donated by T'Other One (thanks!), I think they were throwing them out at his work.  Any slight areas of damage will be hidden in the texturing. The board is 5mm thick, so the side walls were reduced in length by 10mm and the front wall of the bake house and the lean-to were likewise shortened.

The pieces cut out and ready for assembly 

Joints were glued with tacky glue and temporally pinned. I built up the main building, the bake house and the lean-to as separate sub-assemblies. The main building got triangular off-cuts to strengthen and true the joints, and the two additions got a length of foam board across the back. 

Sub assemblies

These were then glued in place, after testing different positions for the lean-to. 

Trialling the lean-to on the side wall.
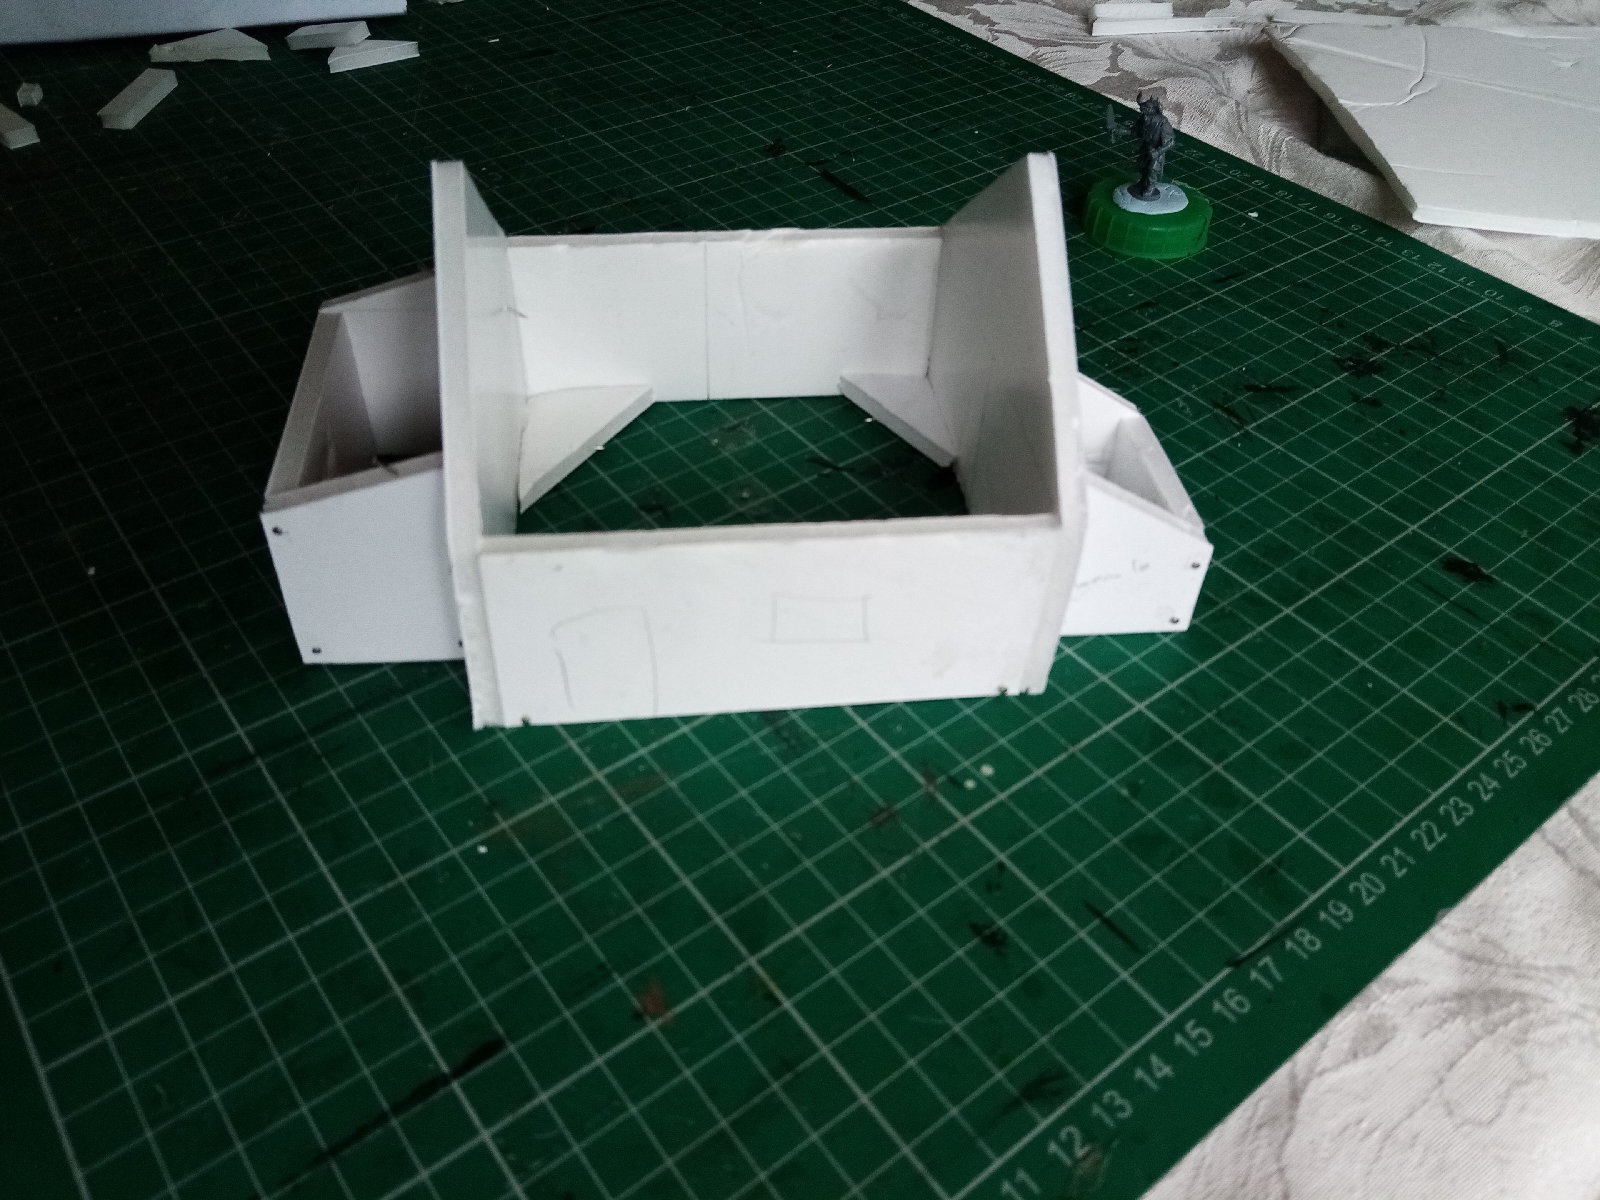
The lean-to on the back wall.

Currently the glue is drying. The next step will be the chimney, probably made out of an offcut of XPS, and card for the base of the roof, then texturing and adding the timbers before my favourite stage, tiling. 

I found the following blog with a very good build of this cottage about half-way down this post.  Not only has he produced an excellent result, he has done the same for ALL the Warhammer Townscape buildings.  I have found a couple of interesting techniques I plan to try on this build, but I won't say what yet, don't want to give all my secrets away to Merlin quite yet. 

Tuesday, 1 September 2020

Games of Times Past

While sorting through my 30 years plus of 'stuff' I came across some old photos of minis and games.


This is a scene from a Flintloque game I made up based on the TV version of Sharpe's Gold.  It was an easy switch to make the rogue band of guerillas into ghouls (in the show they are bloodthirsty Aztec cultists, not what Cornwall wrote at all).  If you don't know Flintloque, it is still published by Alternative Armies, and is essentially a fantasy version of Napoleonics, with orcs as the British, elves as the French etc.  The game initially focused on the exploits of a certain officer named Sharke and his rifle-orcs.  It's also a great source of truly awful puns.

I can't remember much about the game, except that I played the orcs and Merlin played the elves.  I do recall that I prepared three games for Merlin's visit, all using the cliff terrain you can see in the picture above. The other games were a fantasy game involving dwarves attacking goblins, which I think used the old Fantasy Warlord rules, and a SciFi skirmish using the recently released Havok rules. I remember we played the fantasy game, but not the Havok game.    

I made the cliffs in spare moments at work (lots of great crafting materials to hand) and they came in useful, though not perhaps as useful as I thought they would, as they afterwards lay abandoned in the loft of shame for two decades.  I've had to throw them out as they were falling apart, and it will be easier to build them anew rather than repair them.  I've access to better materials now, such as XPS, and I may well produce something similar in the near future. There will certainly be more areas for individual minis to stand, ideal for skirmish games.
You can also see in the distance some buildings I made based on the card buildings in Terror of the Lichemaster and The Tragedy of McDeath.  The ruin the cowardly elves are hiding in is the one from Bloodbath at Orc's Drift.

Speaking of which...


These pictures show our mass game of Orc's Drift.  I mentioned this a while back, but briefly we played through the campaign as a send of for Merlin as he was moving up north of  The Wall back in 1999. You can see the full set of Orc's Drift buildings, I still have some of them, but they haven't stood the test of time very well.  They should be repairable though.  I'm sure the roads are Merlin's, and the elves probably are too, though the high elf with bow (standing in for Brommedir - near dead centre on the top photo) was mine. The orcs and dwarves from the old plastic regiment were mine too, but most of the players chipped in with minis to make up the armies. The strange green thing between the buildings in the bottom photo is an old wyvern (Hincliffe Models?), the mount of King F'yar.

I'm afraid I can't remember the outcome, but I do know we all had a lot of fun.

Monday, 31 August 2020

August Update

After fairly frantically posting my orcs I seem to have stopped. Well I've still been painting, most recently I started on the dwarves to go with the orcs for my demo set. I've nothing really ready to show yet, and I'm sure no one wants another step by step guide from me quite yet. Besides, I'm still not sure if I am going to paint/repaint everything from scratch for the dwarves, or just rebase where I can.

I've also been spending a lot of time sorting through over thirty years worth of gaming stuff. There's a lot that I certainly won't use again, so I'm thinning out the collection and having a good think about what I'm likely to be playing in the future. It's an entertaining exercise (mostly) and I'm finding stuff I have no recollection of ever having, and even more part done projects. I have, for instance, a good number of part done buildings, based on the old Games Workshop buildings in Blood on the Streets. I'll slowly work through finishing them, I think they are well worth the effort.

Friday, 17 July 2020

How I Paint Mantic Kings of War Orcs - Part 5, Finishing Touches

Concluding my step-by-step guide to painting orcs.  You can find part 1, assembly, here, part 2, basecoats, here, part 3, highlights, here, and part 4, shading/washing, here.

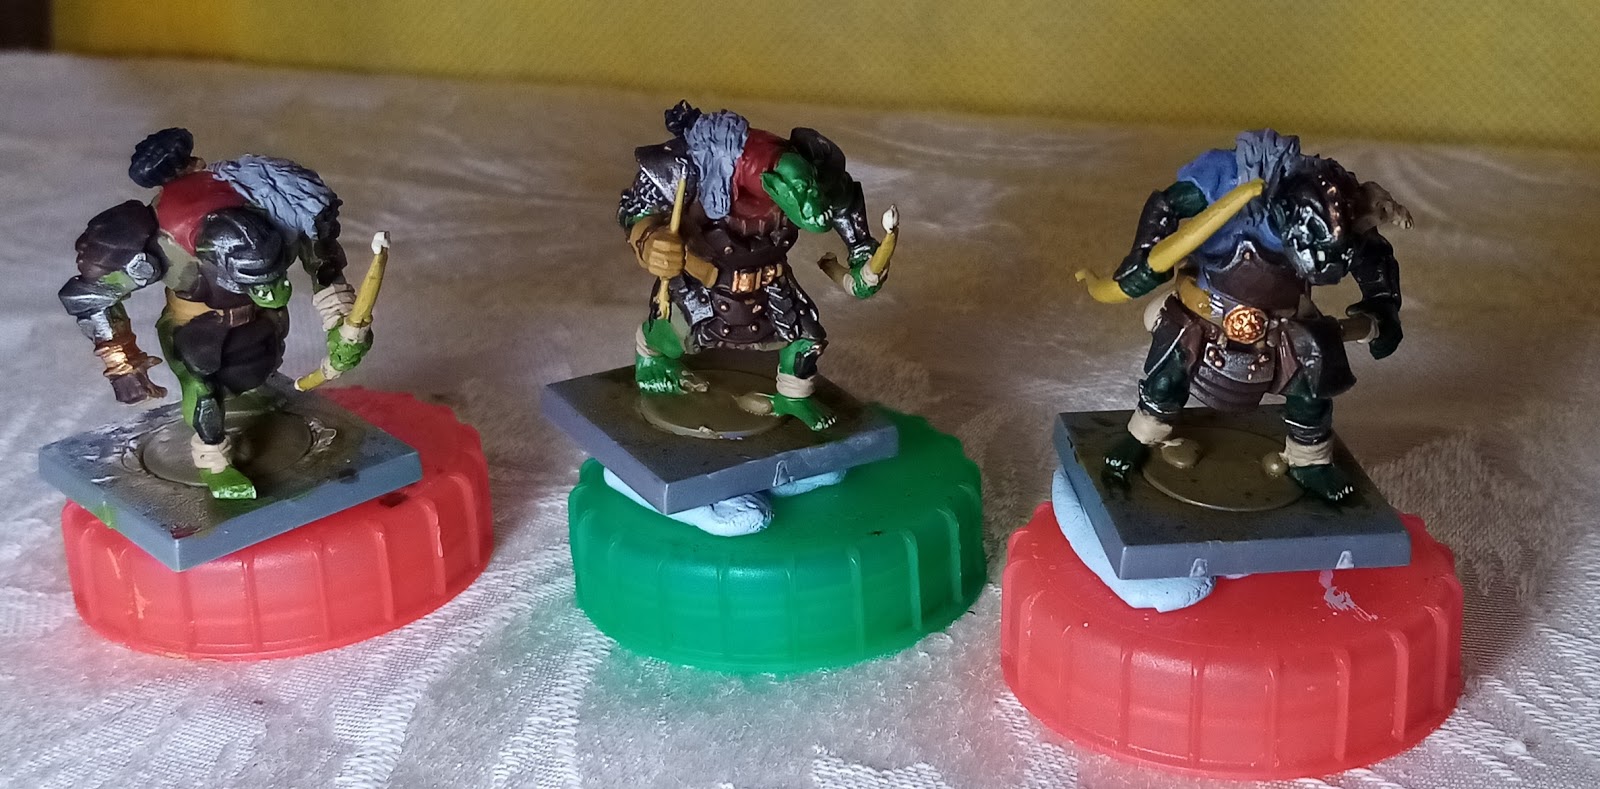
The final stage just adds some details and sorts any tidying up that is required. For the Skulks, I painted in the eyes using VGC Hot Orange and added some highlights to some of the teeth. The face is the focus for a model, so it's worth paying a bit more attention to this.
I also gave the fur an extra drybrush, again with VGC Stonewall Grey.


Once everything is dry it's simply a case of varnishing (if you feel it's necessary) and then basing as required.

I've seen too many paint jobs get worn and chipped to not varnish. Back when I used Army Painter dips they solved that problem, but did need something to matt down the gloss finish. Nowadays I use Wilkinson's Clear Gloss Yacht Varnish, which gives a very tough finish. Keep the coat thin, if applied too liberally it can give a slightly yellow tint. The stuff takes at least 24 hours to fully dry. Then I brush on Windsor and Newton Galeria Matt Varnish. I used to use Army Painter Antishine, or even Games Workshop Purity Seal, but I find the W&N stuff gives a much better matt finish. It usually takes a couple of coats though, it's virtually impossible to completely cover the mini in one coat.

If a mini has a shield I paint any emblems on top of the gloss varnish. The smooth surface makes it easier and it gets a protective coat from the matt varnish.

I hope this has been a useful series.  Please leave a comment about how you paint wargming units.

This is pretty much how I paint most things now apart from heroes and RPG character minis. I used to just do a basecoat, albeit much lighter, and dip, but I like the effect of the highlight stage, and they are just ordinary troops after all.

Using the shade washes does somewhat limit the colour choice. Light greys, white and blues can end up looking dirty. I tend to choose colour schemes with this in mind though. If necessary, washes can be applied to individual areas to mitigate this. White, for instance, can be washed with VGC Light Grey Wash, as I did on the Star Saga lab technicians.

I can't think there is a need to do a post on the varnishing (just imagine them all shiny, then all matt), but the basing will be the same as the orc demo army I painted under 'Fighting Apathy' which gets a post all about basing (once it's done).


Thursday, 16 July 2020

How I Paint Mantic Kings of War Orcs - Part 4, Shading/Washing

Continuing my step-by-step guide to painting orcs.  You can find part 1, assembly, here, part 2, basecoats, here, and part 3, highlights, here.

Last time the orcs were looking a bit garish, with bold, bright highlights. The shading wash tones down these extreme highlights and adds additional shading.

When I first started painting Kings of War armies I was also first using Army Painter Quickshade dip. I found the results good enough to get an army done pretty quickly, and used it on my old orc army, the few units of goblins I have done, and my previous demo armies of undead and dwarves.  It does need some care not to flood detail, and I soon decided that brushing it on gave more control than just dipping.

When Army Painter released Quickshade washes I tried those, and preferred them as they were easier to control and even permitted different shades to be used on different parts of a mini. I still wanted to varnish, though.

Experimenting with 15mm minis (see my League of Rhordia, my Greeks and my Ogres) led me to try lightening the shade, eventually I settled on a 50:50 mix of Strongtone and Softtone.  This smooths out the harsh highlights, adds depth and avoids the dark, dirty look that some of my minis are guilty of.

Anyway, here are the orcs with their shade wash done.  The VEO Heavy Grey hasn't quite worked as well as I would have liked this time, I will admit to rushing the highlighting stage a bit, but I'm pleased overall.


Now there are just a few details to paint in that would have been obscured by the shade wash, then varnishing, basing etc.

Wednesday, 15 July 2020

How I Paint Mantic Kings of War Orcs - Part 3, Highlights

Continuing my step-by-step guide to painting orcs.  You can find part 1, assembly, here, and part 2, basecoats, here.

Once everything is dry I add the highlights.  Because we are going to add a shading wash afterwards, they don't have to be too subtle, they need to stand out.  In fact, after this stage they should look a bit garish.

I add the highlights in pretty much the same order that I painted the basecoat. So starting with the flesh, the VEO Blackgreen is highlighted with VGC Sick Green.  Where Sick Green is the basecoat, I highlight with VGC Goblin Green with a touch of VGC Escorpena Green (Livery Green is a good substitute).  The Goblin green gets a highlight of pure Escorpena Green.
The Gunmetal Metal is highlighted with VGC Chainmail Silver.  As the armour etc has already been given a black wash this is more of an edge highlight on armour plates and blade edges.

Gory Red is highlighted with VGC Bloody Red, Sombre Grey with VGC Steel Grey, Heavy Siena with VGC Beasty Brown and Heavy Grey with VGC Dead Flesh.

Leather armour plates are edge highlighted with VGC Earth, and the various leather straps etc with VGC Plague Brown.  Khaki cloth items are highlighted with VGC Bonewhite, and horns, large armour skulls etc in VGC Off White.  Wooden items are given some streaks of VGC Khaki to represent wood grain, but I'll admit to not being very good at this.  Any large bronze items are highlighted with VGC Glorious Gold, but I don't bother with small stuff like the studs.

Last time I forgot to add some dark shade to the furs.  A line of Army Painter Dark Tone (or other similar wash) gives the fur a more realistic look, as many animals have darker fur down their spines.
The fur was then drybrushed with VGC Stonewall Grey.


Once everything is dry, it probably looks a bit of a mess.  The wash will bring everything together, trust me, part 4 is here.

Tuesday, 14 July 2020

How I Paint Mantic Kings of War Orcs - Part 2, Basecoats

I'm working my way step by step through another unit of orc Skulks to demonstrate how I go about painting them.  Part 1 showing assembly can be found here.

Once the undercoat was dry, I got the orcs basecoated.  I have an order in which I do things, sort of sub processes I suppose, I've found it helps to organise myself like this.

First I paint the skin tones.  I use three different base colours, Vallejo Game Extra Opaque Heavy Blackgreen, Vallejo Game Color Sick Green and VGC Goblin Green.
Then the armour and other metal items in VGC Gunmetal Metal.  After this stage is an excellent time for a cuppa.

Then I paint the cloth in a combination of four colours, either VGC Gory Red, VGC Sombre Grey, VEO Heavy Siena or VEO Heavy Grey. I pretty much randomly assign colours to different bits of different models, though I try to avoid having similar posed models having too similar colour schemes. Another short rest for a cuppa and a biscuit, then on with the details.

As these were skulks and I wanted them to look less well armoured that other orcs I painted some of the armour plates in VGC Charred Brown.  I also painted the fur capes VGC Cold Grey.  All belts, straps etc were painted VGC Leather Brown and wooden items were painted VGC Desert Yellow.
Cloth items such as bags, pouches and the wraps around the orcs' ankles were painted in VGC Khaki, horns, teeth and nails and some of the skulls decorating the armour were painted VGC Bonewhite.
I painted the feathers and knife handles Vallejo Model Color German Grey and added some details such as metal studs in VGC Bright Bronze.  I often paint random armour plates or decorative detail in bronze for my other orc units, but I wanted to emphasise the lightly armoured nature of the Skulks.


Once everything has been given a good amount of drying time I wash the metals with VGC Black Wash, and since I wanted the leather armour to look dark, I gave those bits the black wash as well.


Then it's drying time, and on to the next stage, highlights.

Wildspire Miniatures: Cultists, Harpies and Ghouls

I'm enjoying painting these Wildspire Miniatures, so here's twelve more. Since painting the previous minis I've downloaded the P...