Showing posts with label RoSD. Show all posts

Sunday, 1 March 2026

Paint What You Got Challenge 25/26 Roundup

Well that's Dave Stone's Paint What You Got Challenge over with until December. 
I set myself a couple of goals: paint the minis for the second Rangers of Shadow Deep mission and paint the minis for the Middle Earth Strategy Battle Game storybook Fellowship of the Ring,  or at least the first half. I did a breakdown of the requirements in December if you're interested. 

How Did it Go?
I'll confess that I didn't manage everything, but I did manage a lot of it. Let's have a look at what I did manage. 

Rangers of Shadow Deep Mission Two 
I assembled (taking advantage of Anne's 2026 Miniature  Assembly Challenge for extra impetus) and painted 15 plastic gnolls, 1 metal gnoll Shaman and a kitbashed Ranger and a Reaper Bones Vulture. 

Teh gnolls all have a red hood or at least a red eyepatch.  skin/fur is a light tan, with dark brown 'mane'.  clothing is a mish-mash of different colours, although the shaman has a black robe. he also has lots of skulls (though no where near GW standard)
Gnoll sergeants, shaman and vulture

Rear view of same. The red wing tips on the vulture are visible
The gnoll 'staff'

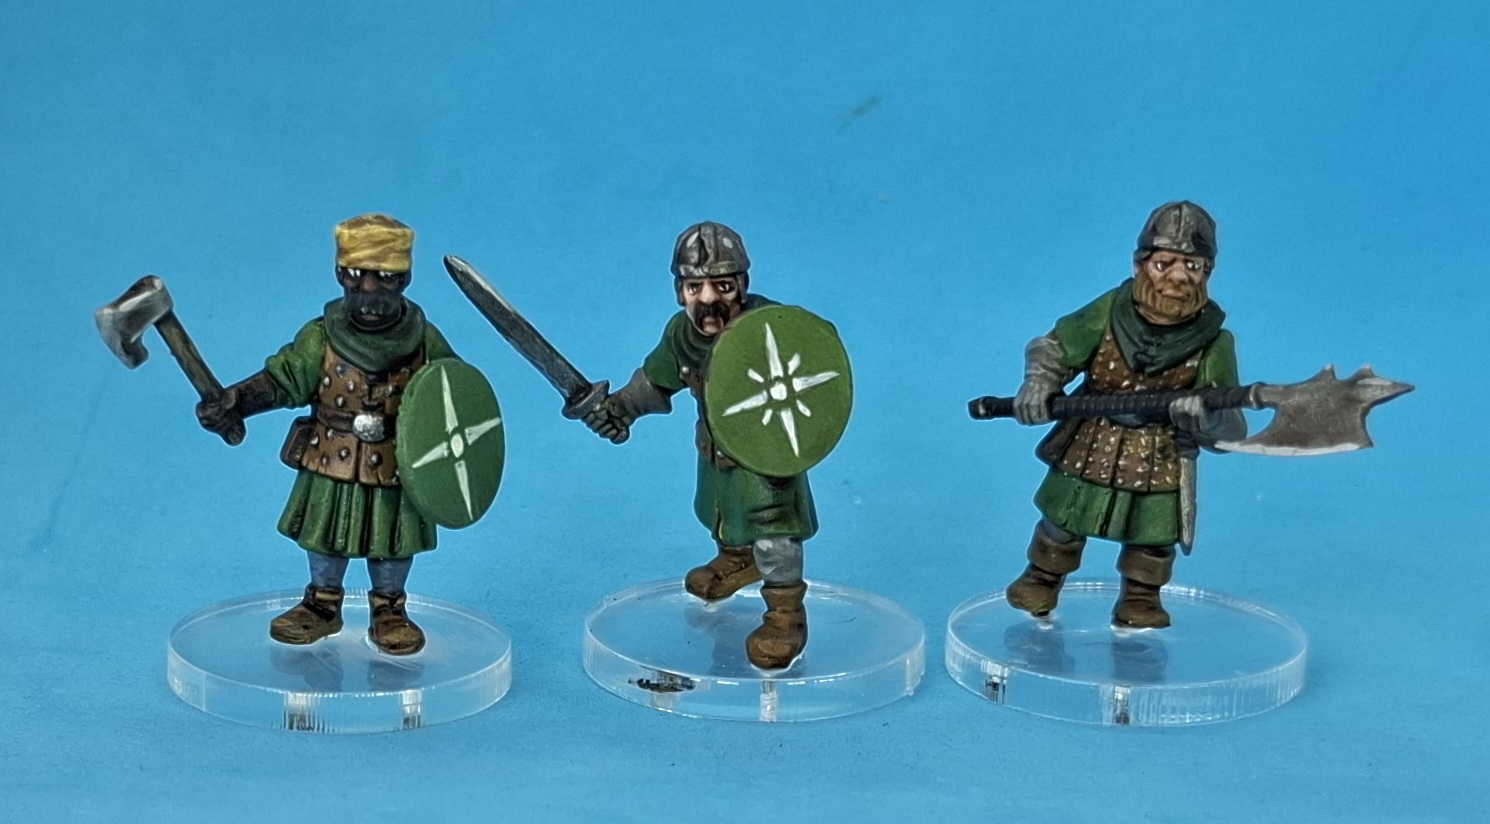
Six gnolls with hnd weapons and shields. Again, multi coloured clothing. Fur/skin tones as before
The Warriors
Rear view of same
Six gnolls running away?

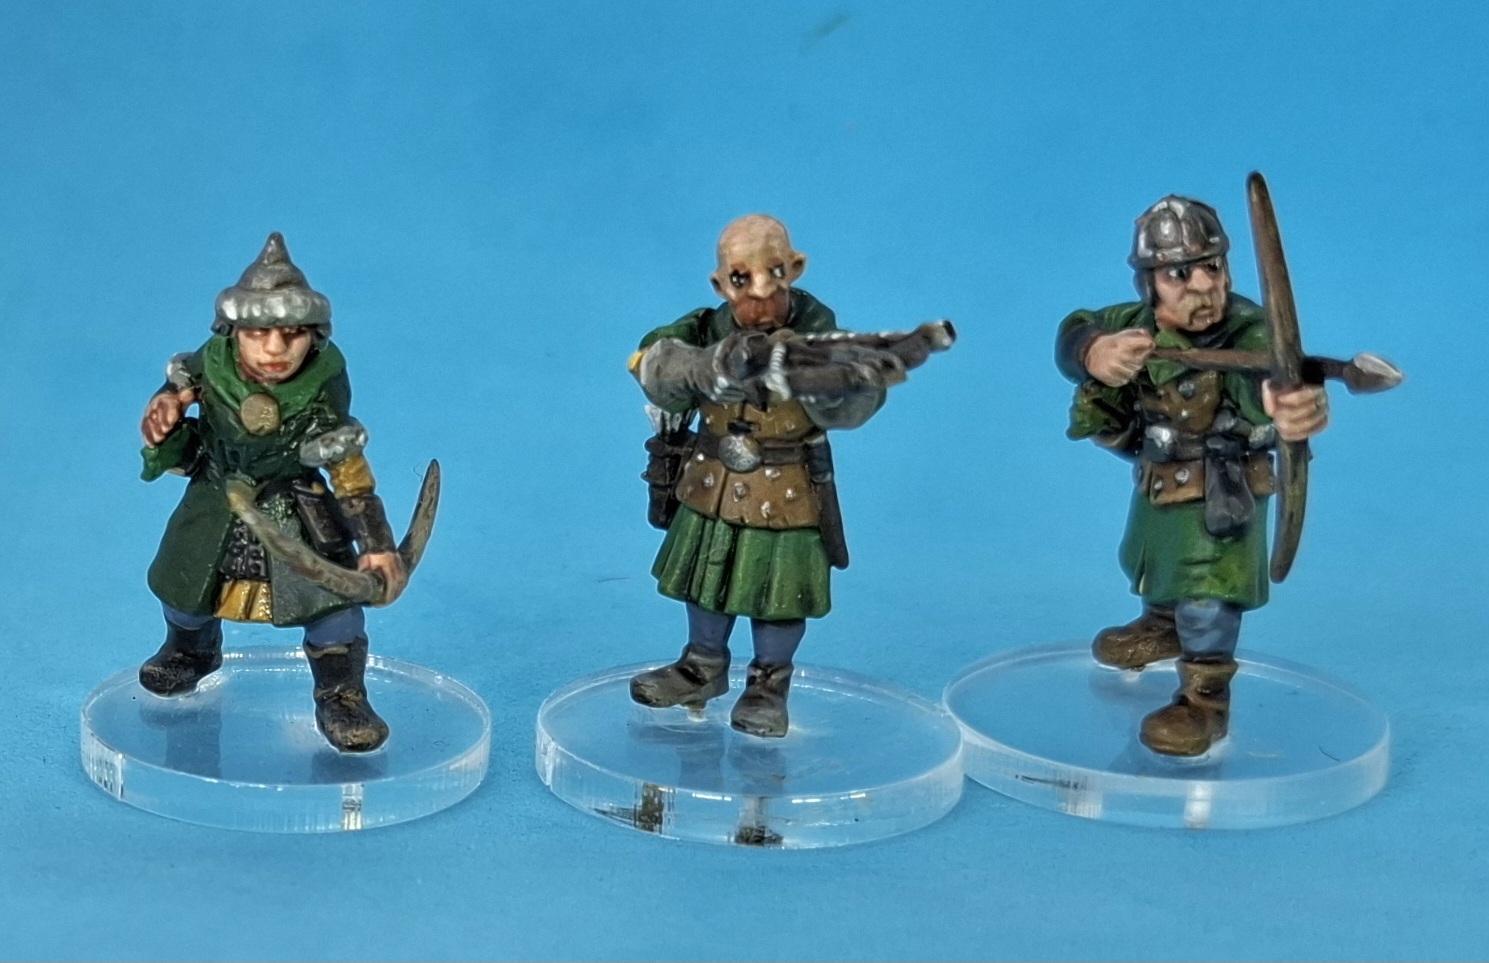
four gnolls with bows and two with crossbows.  Equipment and fur etc as standard
Gnoll archers
Another rear view of some gnolls
'Dum-de-dum-de-dum-de-dum'

The gnolls go together pretty well, and bits from other Frostgrave kits can be used, as I did with the great axe for one of the sergeants.  If/when I build the remaining sprue, there's a two handed hammer on the Barbarians sprue that I think I'll use.  
While they were fun to paint, I regret making the decision early on to use as many different colours on the cloth as I could.  

Kitbashed ranger with long green cloak, leather jerkin over dark yellow shirt and grey fur 'skirt' and dark grey trousers.  He has a helmet and is holding a sword raised in his right hand and a bow in his left.
Another Ranger (of the Shadow Deep)
Rear view of same
Kitbashed from many sources
The ranger is made up from bits from the Frostgrave Barbarians sprue and the Oathmark Human Infantry sprue, with the scabbard from the Light Infantry set.

I also painted a couple of resin tents and a resin piece with fallen lög, shields, backpacks etc. for the gnolls' camp. These are from Scotia Grendel; nice models, if, perhaps, not quite 'gnollish'.

The campsite

Nine homemade bushes for the first scenario in Mission two.  These were a quick build, there's a full description coming sometime soon.

Nine bushes, roundish shapes ranging from around chest height on a mini, to considerably taller than a mini.  They are basically 'fuzzy' green blobs
Ranger and gnoll hide and seek among the shrubbery

The second scenario requires a lot of scatter terrain for the inside of the tower.  Here's a start, but I'll need a lot more.

The crates and the board use Crooked Staff Print and Paste textures; the Build Along Dungeon for the floor textures and 19; Chests and Crates for the crates.  There are many similar products available; I like the Crooked Staff stuff as its cheap (Build Along dungeon 1 is, I believe, free, and the rest are pay what you want) easy to make and generally relatively low on ink use and I like the art style. 
I may print off some more floor texture and base the crates in small groups once I've built some more. 

Fellowship of the Ring Journeybook 
This was the big disappointment.  I managed two Rangers of the North, that's all. These took a lot longer to convert than I anticipated, it's my own fault for being too fussy (or too tight to buy the actual minis). 
I enjoyed building and painting them, and I'll continue with them, but possibly with a more realistic timescale. Once I have enough finished, I'll do a post discussing how I make them, and possibly why I bother. 
And yes, I know the bases are untextured; I'll do all nine at once when they are finished.

Two cloaked, bow armed rangers.
Two Rangers of the North

Each ranger has a backpack
"Shadow Deep? What's that?"


Hints and Mysteries
In my last post I suggested that I had a unit painted for my undead that I was keeping secret.  Well, on closer inspection, I haven't finished the shields, so you can rest easy on that front Dave.

Challenging Fun 
Once again I really enjoyed taking part in the challenge and thanks to Dave Stone for all the work he puts in to organising this and the Season of Scenery challenges every year.
If I didn't finish everything I wanted to, it's my own fault for either being too ambitious or too distracted, especially as I've had a lot of rehearsals to fit in as well for April concerts.

What's Next?
I'll continue to prepare stuff for Mission Two, and I want to get more MESBG stuff done, but I promised something new for March, so expect some Deep Space action soon.

Thursday, 26 February 2026

Paint What You Got Challenge 25/26 - Photo Finish

Today's the final day of Dave Stone's Paint What You Got Challenge and, while I haven't finished everything I planned back in December, I've got to a straight edge, so I'm calling it done.  

This is what I've managed to get painted in the time allowed.

Terrain and minis, mostly for RoSD (details in later posts)
The Finished Haul

I'll do a longer post soon, discussing the minis, but for now, here's a photo showing it all*

*Actually, there is more. I've got a unit done for my undead for Bodvoc's Dark Shadows campaign, but I'm keeping them a secret for now.

Monday, 16 February 2026

Paint What You Got Challenge, Two Weeks to go*

Dave Stone's Paint What You Got Challenge finishes on the 26th of February, so how am I doing?

Well it could be better, a combination of other tasks and obligations (not to mention concert rehearsals) means that I've not had as much time hobbying as I'd like. 

Still, I'm well on with the gnolls for Rangers of Shadow Deep. 

Progress so far
I've finished the first batch of five gnolls, plus another five from the ones I built for Anne's Miniature Assembly Challenge.  I've also finished off the last little bits on the vulture and the campsite bits.

Ten gnolls wearing various colours of faded cloth and carrying a mix of weapons
Ten Gnolls
 
All the minis were painted with Army Painter Speedpaints.  I was looking for fairly washed out colours, old cloth that the Gnoll have stolen or scavenged. I think Speedpaints work rather well for this. 
I prepared the first five with a grey prime, black shade and white drybrush.  For the second batch I primed in light brown, washed with Army Painter Strong Tone and drybrushed with Vallejo Game colour Off White (the campsite was a test of this). I'd hoped it would give a warmer effect, but I'm not convinced there's much difference.  
I've also changed slightly the way I did the metals.  I used VGC Chainmail after the bulk of the Speedpaints were applied, then shaded it with Gravelord Grey.

I might add a few extra details, such as teeth and claws, but they'll do for now. 

Gnoll Archers 
The shooty gnolls. These are armed with bows, but I've a couple more with crossbows to paint. 
The archers showing a wide variety of coloured cloth and some pretty ragged looking equipment
Four gnoll archers
Front view of the archers.  The heads with the mane of darker hair are prominent
Twang
Gnoll Soldiers 
The fighty group.  There's a good variety of miscellaneous weaponry here. I thought about shield designs, but then I see them as crude wooden construction.  Anyway, the gnolls don't care.
As with the archers, they are dressed in various rags.  the colours come out quite bright on the picture, they are duller in real life
The warrior section

Gnoll Sergeants and Recon
Gnoll sergeants use two handed weapons, there are two options on the sprue.  I like the idea of the hood like cloth denoting rank, I just wish I'd thought of it when I built the first sergeant with the axe, but I've kept the red theme in  his eyepatch. 
They are accompanied by their vulture.

Gnoll with two handed sword and one with a great axe.  The vulture is perched on a tombstone
Sergeants and vulture
Rear view.  The red wing tips on the vulture are just visible
I'm pleased to have got these done, but they were, at times, a shore.  Part of the reason is my decision to go multi-coloured on the clothing.  I think I over did this, and I got a bit obsessive in trying to make the different models look as different colour wise as possible.  I'd have been better off choosing three distinct colours and applying them over all the minis.

What's Next?
I've the remaining five gnolls, plus their shaman already started, and three rangers to finish too, one of the Shadow Deep, and two of The North.  I'd like to get some more done, but I think time is going to run away with me.  I wonder if I can claim the Julian Defence again?


* Probably considerably less by the time this gets posted.

Tuesday, 3 February 2026

January Update: Anne's Miniature Assembly Challenge Results

I joined Anne's 2026 Miniature Assembly Challenge near the beginning of January with the aim of building enough Frostgrave gnolls for the second mission, converting some MESBG Rangers of Gondor into Dunedain, and possibly building a couple more minis. 

How did I do?

The back two ranks are ten more gnolls plus a RoSD ranger, at the front are two converted Dunedain.  Everything unpainted of course
Assemble miniatures, gnolls, a ranger, and two different rangers

Well I managed ten more gnolls, more than enough, but it finished off the sprues. 
I also built an extra Ranger, nominally for T'Other One to use when we tackle the second mission.

Dunedain
The Dunedain were less successful; I finished two, but they were more work than I anticipated. 
Two converted Dunedain

both with backpacks
I wanted them to look sufficiently different to the Rangers of Gondor, so I decided to do away with any masks, shift the quiver to the hip, remove the sort of tabard thing and add extra equipment.  This was inspired by the official miniatures from GW. 
Alas I didn't take any pictures of them prior to converting them, but you can find plenty of pictures online if you're interested. 
The masked head on the firing ranger was removed with a razor saw and replaced with a bare head from (I think) the Frostgrave Soldiers sprue. I used quivers from the Oathmark Human Infantry sprue and concealed the mess made by removing the back quivers with Frostgrave backpacks etc.
I filled in the gaps with a 50-50 greenstuff and milliput mix, and made some attempt at showing the straps, but it's not perfect. 

I didn't complete the required nine Dunedain, and never started on the Dark Emissary I'll need for Boðvoc's Dark Shadows campaign, but even so I'm pleased.  I've got plenty to paint in February for Dave Stone's Paint What You Got Challenge. 

I missed the target for several reasons.  The Rangers were far trickier than anticipated (and I realised that I was short of four minis anyway). I've also been busy playing a lot of music, which has been glorious (Renaissance town bands and verse anthems among others), but hasn't helped assemble anything. 

If Anne runs the challenge again next year,  I certainly want to take part. 

And a Show
I did manage to get to York Wargames Society's Vapnatak on 1st February.  
My haul was modest, but useful. 
Five more Rangers of Gondor undercoated black, a skeleton, seven skaven and an Ugnaught, a a Twi'lek, a Dark Hellion, a Dug and an elite militia (surely a contradiction in terms?)
Vapnatak haul

I picked up five more Rangers of Gondor, so that's one excuse gone (see above). Seven monotone Skaven,  in case I ever get around to Vengeance of the Lichemaster (the seller threw in a skeleton missing it's slotta base,  but that's not a problem. 
I also got a selection of the old WotC prepainted Star Wars minis. 

Apart from the second hand stuff I got some more d10 dice for games of Warlords of Erehwon. 


Saturday, 17 January 2026

PWYG 25/26 and AMAC 26 Further Progress

I'm around three weeks into Dave Stone's Paint What You Got Challenge and a couple of weeks into Anne's Miniature Assembly Challenge.  
So how's it going?

PWYG
Well it's been a busy week outside of the hobby (lots of music), and I've done very little painting, so PWYG has been a bit in the background apart form a bit more paint on those zombies.  I haven't even managed to finish of the 

AMAC
I have managed to assemble another five gnolls, finishing the plastic gnolls I wanted for the second Rangers of Shadow Deep mission.  There's still the Herbalist/Shaman, but he's the metal model I got at RECON last year, so doesn't count for the assembly challenge.

Two crossbow armed gnolls, the sergeant (with barbarian arms and greataxe) and two warriors with hand weapons and shields
The next batch of gnolls

Four of the gnolls are pretty standard, I used the crossbows this time, rather than bows. For a bit of variety,  I used the greataxe from the first Frostgrave Barbarians set. It fits pretty well on the gnoll bodies,  and the bits of armour help sell the idea of the sergeant being a bit tougher. The arms are a bit more muscled than the gnolls, but I guess the sergeants get first dibs on any protein?

Whats Next?
I want to get soem Dunedain built for the early scenarios in the Fellowship of the Ring book.  These will be kitbashed, based on the GW plastic Rangers of Gondor.  I plan on adding a few bits from various sprues to make them look less like the Rangers of Ithilien, so hopefully they count in the challenge.

I've a couple more minis I'd like to build too, more on those later.

Friday, 26 December 2025

PWYG 25/26 Planning

A little while ago I ran through a few options for Dave Stone's latest Paint What You Got Challenge. 
If you've been pondering what I've been pondering, (I think so Brain), you'll see that some of them build nicely on games I'm enjoying at the moment, or have recently; some are more for systems that I rarely play. 
It makes sense to go for the former, but then, I'm not always sensible.

So here's a look at what I'd actually need for a couple of the projects. 

The Tower, Rangers of Shadow Deep
Miniatures 
This mission mostly involves gnolls.  Looking at all three scenarios, and allowing for the event cards, I'd need 1 Shadow Knight, 1 Flesh Golem, 1 Gnoll Shaman, 2 Gnoll Sergeants, 4 Gnoll Archers, 6 Gnoll Fighters, 1 Giant Vulture and a Soldier (Man-at-Arms). If I factor in the Challenge Level additions I'll need another Shadow Knight, another Sergeant and an Ogre.
Now I already have a painted Shadow Knight, a FleshGolem and an Ogre, and a few Men-at Arms too. after picking up the gnoll herbalist at RECON I've got the rest of the required minis, they just need assembling and painting. 

Terrain 
The first scenario is outside, so it might be time to finally make a proper gaming mat with reasonable colours and textures. I'm looking at it as practice for something larger. 
I'd also need a river, a bridge and various rocks and shrubs. All useful terrain items for future gaming. 
The remaining scenarios are set indoors, for which I'll simply print off some dungeon style flooring.  I've got plenty of PDFs to choose from. 
Furnishings will probably come from the Mantic Terrain Crate, which I might finally get around to painting,  well some of it anyway. 

Fellowship of the Ring Journey Book
This is a project that I've long wanted to do, and now seems a good opportunity,  especially as 2026 is the 25th anniversary of the Fellowship of the Ring film release.  Don't you feel old now knowing that*.
To keep things manageable I think I'll stick to the first book of The Fellowship of the Ring, up to Rivendell.
For this I'd need 9 Nazgul (foot and mounted), 9 Dunedain, the 4 Hobbits, Gildor, 4 Barrow Wights,  Tom Bombadil and Goldberry, Aragorn, Gandalf and Glorfindal. I could add Farmer Cotton and his dogs if I include one of the additional scenarios from an old White Dwarf.
And there's terrain of course.  I'm not sure if I should stick to the builds in the book,  which do a great job of making thing as multipurpose as possible,  or do some more specific pieces.  I'll probably end up doing a bit of both.

A Cunning Plan
So that's the plan.  I do have some Undead that I'm part way through painting, so I'll try and finish those as well, but it'll be nice to do some living creatures for a change. 
I've started on building five of the gnolls using the Frostgrave gnolls kit.

And finally, the Christmas Haul
I was gifted four hobby related presents; a GM's mug, a deck of 7TV profile cards, a light pad (great for copying maps etc) and a lovely 3D printed Beholder.  So many thanks to my amazing family,  and T'Other One as well.
I'll be squeezing the Beholder into the challenge,  after all, I got it before the 26th.

* Don't worry,  I still remember the excitement over the imminent release of The Silmarillion.


Wednesday, 26 November 2025

Scatter Terrain for Skirmish Games

At the start of the year I used the Paint What You Got Challenge as an opportunity to prepare for the first Rangers of Shadow Deep mission. This was mostly building, kitbashing and painting minis, but I did want to add to my terrain collection as well.  I managed to finish five Nest Trees, but there were several other bits that weren't quite finished. 
They were all built and painted by the end of March, but I couldn't decide how I wanted to base them. Long time readers of the blog will recognise this as a common fault in my hobbying, especially with regard to terrain.

Other things got in the way, of course, but I've just got around to finishing these three pieces.

Three bases of rocky terrain.  A set of rock spires in a pale grey with brownish tones, a low squarish boulder and a craggy tor like collection of three different height rocks.  The later two are a darker grey, but again with brownish tones
The three rocky bases

The same from a different angle, showing some of the smaller rocks around the base of the tor
A different angle

Rocks
Many skirmish games benefit from cover, and rocks and boulders are one possibility (they are a big part of many Rangers of Shadow Deep scenarios).  These were simple to make, just carved scraps of XPS textured with a ball of foil.  I'm experimenting with different forms and colours, as I plan on making more of these.  Each piece has a slightly different function in game;
Boulder  This is the simplest; a big rock that provides cover and acts as an obstacle.  The colour scheme is similar to the Tors, classic wargamers grey rock. This, and the tor, was designed to allow minis to be placed on the rocks.
Rock Tor  This blocks line of sight or provides cover.  It can be climbed over, and minis can be placed on it.  The form and colour was loosely based on the gritstone formations found locally, though those tend to be darker, thanks to a couple of hundred years of industrial pollution.
Rock Spires  These block line of sight and can't be crossed, at least by creatures limited to surface movement.  I painted them a lighter sandy colour not so obvious on the photos, possibly influenced by vague memories of Bryce Canyon.

Back to Bases
For years I simply stuck terrain on to MDF, prior to that I used hardboard, which is even more prone to warping than MDF, and in the early years, just cardboard.
Fairly recently I discovered foam board (NOT the XPS sandwiched by thin card stuff). Waterproof, so it's much less likely to warp, and very easy to cut. This is now my basing material of choice, at least until I discover something better.

To texture, I used to use sand and paint, latterly with static grass and tufts to finish off. But this gives a fairly uninteresting result. 
I've seen some great terrain and basing, for instance, this Middle Earth themed set from Microforge Minis; if I can achieve something like that, I'll be more than happy.
A lot of hobbyists use dried, baked soil, but round here this tends to be quite dark, almost black. To match my mini bases I want something more traditionally brown. I'd like to grab some of the lovely rich brown soils from the Vale of York, but so far I've not got round to it. 
Failing that, I've been collecting dried tea leaves (loose tea*, as it has a nice granulated texture) and dried coffee grounds. 
There are potential issues with using these; they can go mouldy, but I've dried and baked them thoroughly first, and I plan on sealing them well, so no additional moisture or air should contact them. 
Fingers crossed, this should work.

The Answer's in the Soil
For my first try (the individual rock) I mixed up some brown grouting powder with dried tea and coffee in roughly 2:1:1 proportions. I found that the pale grout was by far the dominant colour, so mixed in a bit more of the coffee. 
The base was given a coat of Mod Podge and the mix sprinkled over, making sure that everywhere was covered.
For the other two pieces I applied patches of tea and coffee to parts of the base; this bit of variety in colour and texture gives a much more interesting and realistic look.  I then filled round with the grout and scattered some over the tea and coffee to blend them more into the ground.

Seal of Approval 
Once the Mod Podge was well on the way to drying, I gave the base a spray of isopropanol. This helps break surface tension and allows the sealant to soak in to the ground texture.
The sealant is simply watered down Mod Podge, a 1:1 mix, though a bit more water won't harm. When I'm doing this stage with minis bases I just dollop it on with a brush, but on a larger bases like these, a dropper or syringe is much better, and doesn't disturb the carefully piled clumps of foliage in the second seal stage (see below).
Unlike just PVA glue, the Mod Podge contains a resin. It's this that I hope will protect the tea and coffee from moisture, as well as making sure that the texture stays on the base.

Green Fingers 
With the soil firmly in place, I added some Fine Turf. I clumped this around the base of the rocks to look like low bushes. I also added some static grass in several different colours and lengths, and finally a few tufts (including some 'flowers').
The vegetation was then sealed in just like the ground texture.

The three rocky bases with minis to show scale.  The lower rocks will provide cover and the taller bits block line of sight
Rangers explore the rocky borders of Alladore

Finally 
So that's three small pieces of terrain.
It might not look like much, but it's important because I've now got a method I'm happy with. I've several more pieces of terrain just waiting for basing, and plenty more that I want to build, such as the Bogel's Farm. 
Now I can get these done and maybe, perhaps, end up with a box of terrain that I'm happy with.

*In this case Rington's Breakfast Tea, though of course other teas are available. It's very tasty though.

** Unless, of course, it all goes mouldy in a few months, in which case it's back to square one.

Tuesday, 7 October 2025

Rangers of Shadow Deep: The Infected Trees

"Scenario 2: The Infected Trees
Examining the bodies of the zombies, along with the other clues from the village, left little doubt.
The village had been attacked by some horrific species of giant spider, whose venom reanimated the dead. Thankfully, such creatures move slowly. Likely, they will have retreated to the nearest shelter to slowly feast upon the missing villagers.
Your duty is clear. Taking just enough time to patch up your wounds, and make a quick pyre for the dead, you set off after the spiders, following their faint, but unique tracks. 
After nearly a day’s pursuit, the tracks lead into a small forest. Chances are the spiders are not too deep in the woods. You must find them, destroy them and any nests they might have made, and, if you are
lucky, rescue any survivors."

The MEGAforce finally got around to playing the second scenario in the first mission. 

All four of us were available, so we each chose one of our Rangers from our previous play-throughs of the first scenario and took either a Recruit or a Warhound from a previous game. The rationale was that all the earlier games had happened and the various Rangers met up on the way to the Trees. Four then took a Companion each to investigate, while the rest returned to base escorting the rescued Survivors.

L to R: Omoranti, Bostol,  Portus Fell,  Gendrin,  Ranger Bob, Wuffles, Valdar and Haflas


The Infected Grove
I set the game up ahead of time, using my Nest Trees and pretty much all the rest of my tree collection. Sadly I didn't really have any other suitable terrain to provide cover and make the going difficult.

The table ready for play; four nest trees at the far end, with a good scattering of other trees filling the rest of the table.  The occasional spider can be seem hiding, and five clue tokens are spread around the board
The Infected Trees with lurking spiders

We'd not got together for a while, so there was a lot of chat and too few pictures.  Here's a brief account of the action.

Opening Moves 
The Heroes advanced, already sighting Giant Spiders ahead. Early shots took out a couple, and Valdar was able to target one of the Nest Trees with a Fireball, burning both it and the Spider hiding in it.
The only setback was both Omoranti and Bostol being Poisoned by a Spider (Grim couldn't roll less than a 17 in the first half of the game, great when it was for his Heroes, less good when he rolled for the Spiders).
The first couple of Cocoons held corpses, but in the third was an elderly woman. At 87 she wasn't going to let mere spiders stop her!

NB, pic at 90 degrees to first.  My Ranger and Recruit head up the near side towards a cocoon, but are stopped by a spider, on the far side, Bob and Wuffles advance towards more cocoons.
The Heroes investigate, meeting venomous spiders and Nest Trees, and destroying them all 

The End Phase 
The Rangers continued their mission. Wuffles was attacked by a Spider, but a rare shaft of light through the canopy drove it off. Sadly the noble hound then fell to a Zombie after sniffing one of the remaining cocoons.
The final cocoon held another villager, but it seemed the danger wasn't over. Two more trees were Infected, but Valdar dealt with one with a Recalled Fireball and as set fire to the other.
With no more cocoons to investigate, and any remaining Spiders hidden away, the Heroes returned to base, stopping only to help Valdar and Gendrin, who had managed to get themselves caught up in sticky spider webs.

The Heroes cluster round the rescued survivors, all threats eliminated
All clear!

Aftermath 
Everyone gained a level. Portius Fell was already level 1 from the first game, so now she's improved her shooting (all that practice on poor helpless spiders).
The rest of us are now level 1 and have honed our Skills ready for Tor Varden.

And Wuffles survived his encounter with the zombie.

Summary 
Well that was a lot of fun. 
The Mission wasn't as difficult as I anticipated, and I set up for the Challenge Level after reading suggestions in the Rangers of Shadow Deep Facebook group.

Initially, everyone kept their Ranger and Companion together, but we soon got into the swing of things and had folk helping out where they were most useful.
My experience was, perhaps, jaded slightly by having both my Heroes Poisoned, so down to one Action a turn. I felt I added little to the game from that point onwards, it's a good job the rest of the company were up to the task.

Mistakes Were Made 
Although the system is an easy one to learn, I still got some things wrong. 
Despite using a Fast Play Sheet, I messed up the second move. This meant that we were moving far too fast (especially Ranger Bob and Valdar, with their base move of 7). We got to the Nest Trees too soon, and took the initial four out of the game relatively early (Fireballing a tree and spider was nicely cinematic though).
I was also rushing through the Event Card results, not reading them properly, so I missed placing the spider and treasure tokens along with the new Nest Trees. Doh! This would have delayed setting fire to them.

But the real reason the scenario seemed relatively easy was the 'spider shooting gallery'. This was down to my not placing any low cover. Bushes and such would have helped the spiders survive until they could contact the company.

If that sounds a bit negative, it's not meant to. Everyone commented on how fun it was, and the ease of learning the rules (excepting mistakes) helps the story to stand out.

Looking Forward 
T'Other One had to use the Barbarian for Bob, as I have surprisingly few male Rangers painted. I'll correct that soon.
I must also make more low cover, bushes, rocks etc; I'm sure they will add to the next scenario. 
I also need to start assembling the minis for Mission Two.

"Only hours after you arrived back from destroying the nest of spiders, you received a message from your commanding officer. Contact has been lost with the beacon tower of Tor Varden, and it is presumed to have been overrun.
You are commanded to round up what men you can and proceed with all swiftness to Tor Varden to ascertain the truth. If the tower has fallen, learn what enemy forces now occupy it and harass or eliminate them as opportunity presents."

Sunday, 6 April 2025

More Heroes for Rangers of Shadow Deep

I can't stop doing stuff for RoSD
I've just finished off a couple more heroes, one of the more specialised Companions, and another Ranger (because you can't have too many Ranger minis can you).

Tall female Ranger in a long green cloak, face mostly hidden by scarf and hood, bow in left hand held behind body, right hand ready to draw scabbarded sword

Barbarian
While sorting through a box of unfinished minis, I found a handful of Frostgrave Soldiers and Barbarians that I started a few years ago for an abandoned project. Barbarians and Savages are Hero types in RoSD, so I got the hairy chap with the shield finished, ready for action in the Shadow Deep.
I went for fairly neutral colours, none of the greens and yellows of the Alladore uniform. He has painted a star on his shield though to show his allegiance. 
As with the earlier Heroes, I used Sonic Tonic (or Marine Juice) to provide the shading, and a bit of highlighting to finish him off.

Typical hairy barbarian with sword and shield.  Mostly browns and greys, hide covered shield with crude white star
Rear view, fur topped cloak is blue grey

Ranger
I also painted another Ranger. She's a Reaper Bones mini, though I can't currently find her name or number on the Reaper website,  I'll update if and when I do.

I'm assuming this lady is an elf, as the style of cloak is similar to some of the earlier elf minis from Reaper. I stuck with greens and browns, though I went with grey boots simply to add a different colour.  I'm not sure what the various decorations are on her tunic. I chose to paint this as a leather jack with metal studs. Some of these studs look like stars, others more like leaves.
I used the horn/ivory look for the bow handle and tips, as seen on one of my Oldhammer elves


This is a nice mini, if a little large compared to the various North Star plastics, but that's fine.  People vary in height and I think that wargames regiments, with everyone the same height, can look a bit artificial.
I like her pose, carefully assessing the situation, but ready for action.
There are a few little details that I might go over later, but she's ready for the table now.

This is something that I've found myself doing more frequently recently. Details on the Ranger above and bits on my previous lot of dwarves. Telling myself that I'll return to a mini at a later date.  I wonder why? 

Friday, 28 February 2025

Paint What You Got Challenge Completed

For the past 48 days my hobby time has been dedicated to Dave Stone's Paint What You Got Challenge. I decided early on to use it as a spur to paint stuff for the first mission for Rangers of Shadow Deep, with the option to start on the second mission if time allowed. So how did it go?

Pretty well actually. While I didn't finish some of the terrain that I'd planned, and I never got on to mission two, I've got a good base of Heroes and Creatures for the game. If the Rangers' choice of Companions isn't too exotic then we can play the first mission easily.
Let's have a closer look at what I managed to paint, if you want more details, use the PWYG tag, or just look at the last couple of months posts.

Heroes 
Four Rangers, three are based loosely on characters we used in our games, though given that we can change equipment between missions, this isn't too important. All three were kit bashed from various sprues, especially the various Frostgrave sprues from North Star Miniatures.
The fourth Ranger is a Reaper Bones Dark Elf.
Four Recruits, the basic hire in the game, wannabe Rangers who might not be individually strong, but are cheap. These are based on the Oathmark Human Light Infantry sprue, with a few bits from other sources.
Two Men at Arms and one Guardsman, These Companions are drawn from Alladore's army. The only difference between them is equipment. Men at arms have a hand weapon and shield, whereas the Guardsman has a two handed weapon. They all use the Oathmark Human Infantry bodies, with other bits from various sources.
Three Archers, in the game, archers use either bows or crossbows. These also use Oathmark Human Infantry bodies. Other bits from the same sprue or from the Frostgrave Soldiers sprues 

Creatures 
Mission one requires zombies, giant rats and giant spiders. I managed eight zombies, four giant rats and four spiders, (well initially I only had four spiders, but I managed to get some more. So, technically I didn't have these at the start of the challenge, so I'll not count them). These are all Reaper Bones minis, acquired from various Kickstarters.

Other Stuff 
I painted up some Reaper Townsfolk as surviving villagers and even managed some bits of terrain.
The biggest terrain pieces are the Nest Trees for the second scenario, but I also finished the Reaper Bones pumpkin filled cart.

The List of Shame 
Not everything got finished, of course. 
One thing I wanted to craft was some buildings with accessible interiors. I built one that works well (though the interior dimensions are a bit cramped) and started another, but the weather hasn't been good enough for using my airbrush outside, so they'll have to wait for spring.
I also crafted various rocks.  These are all painted, but the bases still need some work. 
I based up a lot of my random collection of wargaming trees, but again, the bases need work.  
My plans to do some hedges didn't get very far, but I've got some ideas to pursue. 
I've also got more Rangers and Companions to paint, kit bashing them is becoming an obsession. It makes more sense to work on stuff for mission two though, essentially gnolls.

Every Day's a School Day 
I learnt some things as well. I experimented with Marine Juice (or Sonic Tonic, and the Sonic Sledgehammer now calls it) and I think it's currently my favourite wash, especially for the lesser heroes. It's a good shading stage for the main characters too.
I also worked on my Slapchop technique. I've sort of used it before, but I've got a much better idea of how to get it to work, and I think I've improved. As part of this, I've persevered with Vallejo's Xpress Color paints, and I'm much happier with them now.

So it's been a great couple of months. It's helped me focus my hobby time, without it feeling too constraining. 
I'm already looking forward to the next one, and I'm wondering about trying Dave's Terrain challenge in the summer.
Thanks, Snap Fit for mentioning PWYG, and thanks Dave for having me onboard.

Wednesday, 26 February 2025

Rangers of Shadow Deep Nest Trees

The second scenario in the first Rangers of Shadow Deep mission calls for four 'Nest Trees' with the possibility of a fifth turning up during the game.  
I've said previously that I'm avoiding building or painting anything too specific for RoSd, but these can be mixed in with other trees in any woodland and they will fit in very nicely in any MESBG scenarios set in Mirkwood.

The Original Trees
I didn't want to scratch build trees, so I used pre flocked plastic trees from a bag I got on Wish. I know a lot of stuff on Wish is poor quality or even outright scams, but these were OK. This bag of mixed sizes might well appeal to thrifty gamers, but if you buy it for 28mm gaming you'll find the trees are small. I got them for smaller scale games, and some will be appearing in 6 and 10mm Fantastic Battles. For the nest trees I'm happy for them to be on the small size for 28mm, I think they'd make impressive 15mm trees.

Sample tree straight from the pack. Very regular and very green 

Preparation
Now the colour of the flock is, being kind, 'garish', and I wanted dead looking trees anyway. A bowl of very hot water softened the glue holding it on, and some laborious picking off soon got rid of it. I was actually impressed with how good the glue was, I've had experience with similar trees where a light draft blows most of the flock off. 
I also took the time to bend some of the branches out a bit, warming thoroughly in more very hot water, then setting the new pose in cold water.

The trees need bases, I've used GW 40mm bases and 60mm MDF in the past. These are 50mm plastic bases from Reaper, included in their recent Kickstarters (I use clear bases for my Reaper stuff, so these are surplus).  A hole nearish the centre for the end of the trunk, then hot glue both underneath and a bit round the top to keep it in place. Originally I planned to use the glue gun to melt the plastic trunk a bit to shorten it and provide a better fix, but the plastic wouldn't melt just with my hot glue gun. I ended up trimming with scissors to give different height trees.

Based and ready for painting

Painting
After basing the trees were given a black prime from a rattle can. Then a heavy brown dry brush (because most people think tree trunks are brown), followed by a grey dry brush (because most tree trunks are actually greyish).

Webs
If I'd thought ahead, I'd have got some of those Halloween fake spider webs, but I didn't.
Instead, I'm using herbal T-bags. These aren't the 'paper' ones you usually find (which actually can contain plastic), but a more 'fabric-y' looking material.  I suspect they are more common in 'exotic' teabags - these were a gift.  I don't know what they are made of, but if unused, they can be teased out to give a reasonable web effect.  The contents will come in useful later, so they are put on one side.

The tea bags in tea bag form, opened out, and teased apart to make webs

This seems to look best when some of the material is caught on the branches, then pulled out before reattaching it further along the tree. It can also be teased out by hand,  just experiment and have fun. 
Of course, these webs aren't sticky, so I used a bit of watered down Mod Podge, with a quick spray of isopropanol first. Too much of this can spoil the delicate web effect, and I wonder if just a spray of matt varnish would have done the job.  Once the sealing mix was drying, I added a few more bits of the material to bulk out the webs.

Finishing Off and Details 
Then it was just a case of adding basing materials, bearing in mind that I wanted them to look like dead or dying trees, and anyway, there's not usually a lot of vegetation at the base of a tree, the tree out competes it for light, water and nutrients.
I gave the bases a coat of coarse sand, but this didn't really look right for woods, it was too bare and needed more texture. This is where the contents of the tea bags comes in, broken up a bit, they look suitably like branches and twigs.
Then I added a few bits of decoration; some skulls and a skeletal torso from Mantic Games' Undead sprue, and some 'spider eggs'. 
These are pellets of 'Pearlite' (a product sold to bulk out soil and improve drainage for houseplants) though small polystyrene balls would work just as well or better. I mixed them into some PVA glue and then just dolloped it on where it looked good. Once dry, a bit more of the webbing to 'nest' them finished the job.

So there they are. Five web entangled spider nest trees.
I'm really pleased with how well these went together, and the materials were pretty easy to source, especially if you use polystyrene balls rather than vermiculite. 

A Recruit faces off against a Giant Spider near it's webbed tree, unaware that another Spider lurks behind him

The Wish trees are decent enough if re-leafed. In fact, I'd suggest that they are a good source of tree armatures for a very reasonable price, if you're happy to buy from Wish. I've got some more in the process of having better foliage added to give me some better trees, which I really must get around to finishing.

Note that I started these quite a while ago, but they remained unfinished as I wasn't quite happy with the bases. I wanted to do a bit of scenery as part of Dave Stone's Paint What You got Challenge , so quickly finished off the bases and here they are.  


Wildspire Miniatures: Bugbears, Mummies and Dire Wolves Painted

In my last post I mentioned that I recently got a set of Wildspire miniatures , specifically the Classic Creatures Expansion 1.  I've be...